
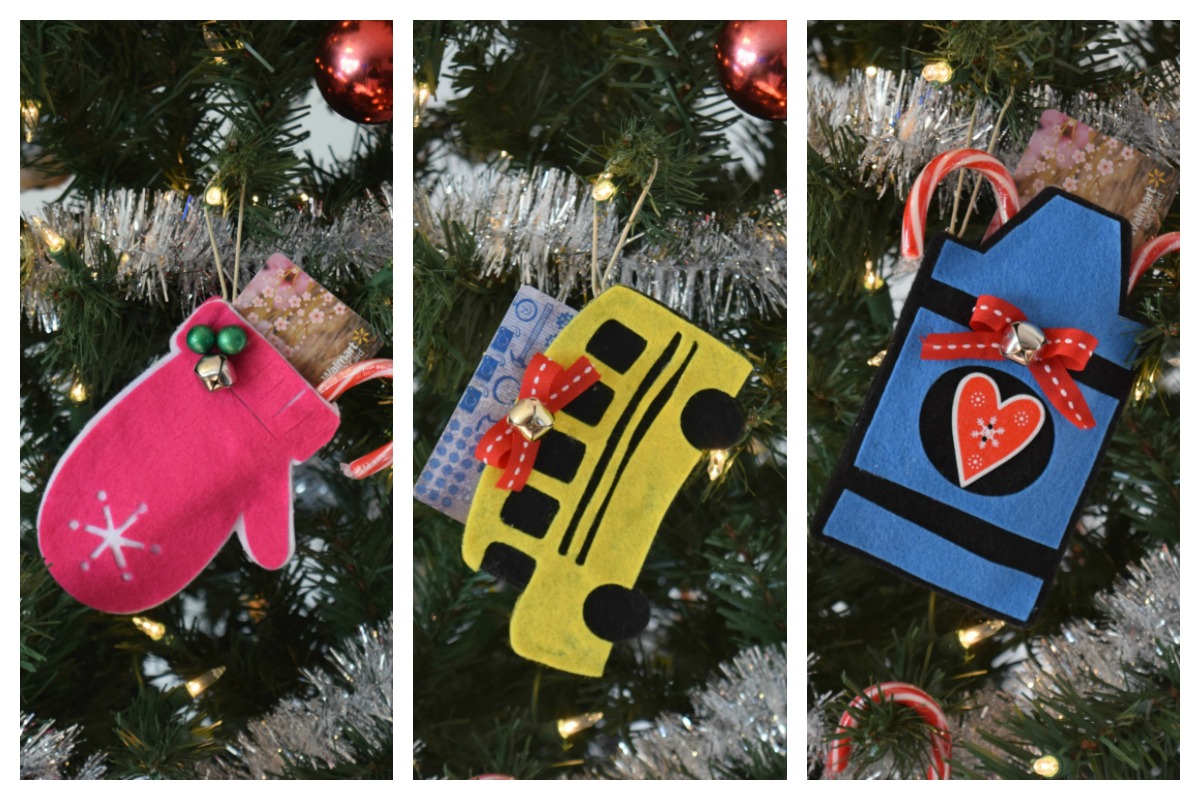
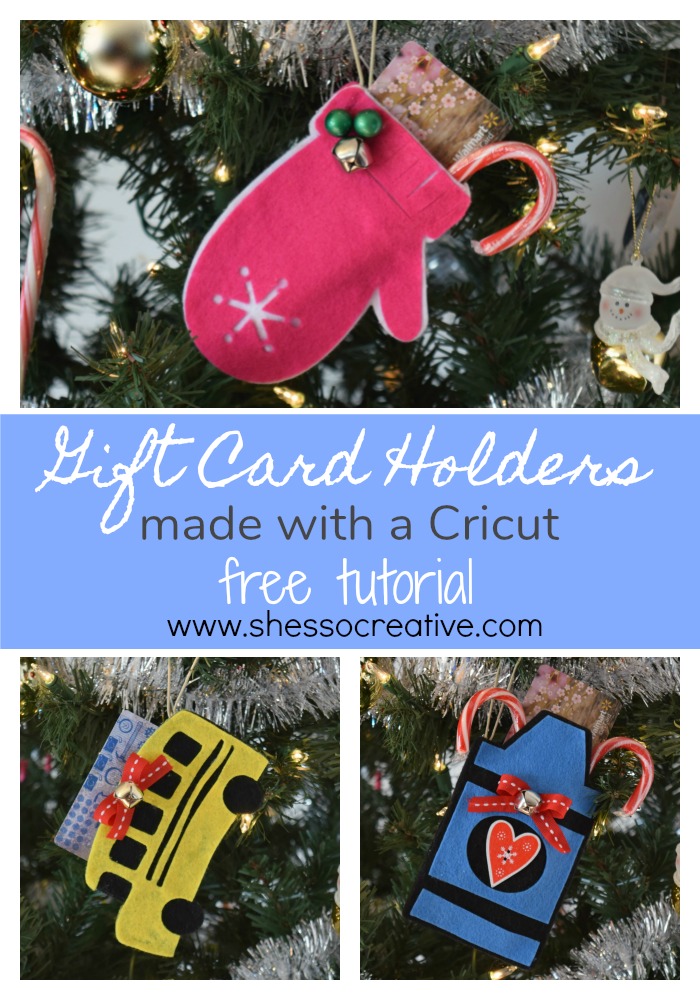
I love the holidays! The spirit of giving is something that fills my heart full, which is why sometimes Gift Card Holders are needed around here.
When buying gifts it’s easy to remember the main people, like Mom, Dad, Sisters, and Brothers, but sometimes we forget about the extended giftees: aunts, cousins, teachers, and even bus drivers!
At no extra cost to you, I may receive a small commission from purchases made through affiliate links, which allows me to continue bringing you awesome free content! This post contains affiliate links.
This is why I love gift card holders! Gift cards make the perfect last minute gift, especially for people you may not know well enough to buy something personal. You can buy a gift card to universal places like a department store, grocery store, gas station, or even coffee shop.
I recently bought a Cricut Maker, so I knew I had to play around and experiment with different materials. Felt makes the perfect gift card holder and seeing that we needed gifts for my daughter’s teacher and bus driver, felt is also great for kid’s craft!
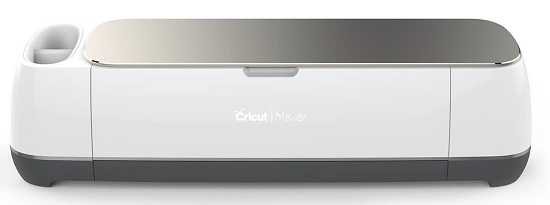
We went into Cricut Design Space, I let my daughter choose which images she liked best and also which colors of felt to use. She helped me load the mat and machine as well. I did the hot gluing though, because she is still too young for that. Hot glue is optional, other child-safe glues would work too, but I wanted something that set quick.
So, we ended up making a Mitten for her teacher and a Bus for her bus driver. After we had them finished, I thought a crayon would be fun too, so we made an extra.
Here’s what you’ll need to make these felt gift card holders:
Materials
Felt Sheets
Twine
Ribbon
Floral Picks
Jingle Bells
Glue (I used hot glue)
Cutting Machine or Scissors (I used a Cricut Maker)
Cricut Rotary Blade (If using Cricut Maker)
Optional: Sewing Clips
Finished Measurements
Varies and is listed with the instructions.
A standard gift card is 3 3/8″ x 2 1/8″ [8.5 x 5.5cm]
Skill Level
Child / Beginner
Craft Time
20 Minutes
Notes
This tutorial is for Cricut Design Space with the Cricut Maker, but you could import any Mitten, Bus, or Crayon image into your cutting machine’s software and make your own with the instructions. You can also print off an image to trace and cut by hand.
If using Cricut Design Space, I suggest joining Cricut Access because you get more image options! There are also lots of great fonts and pre-made projects included AND you save an additional 10% when making purchases on Shop Cricut!
When using felt, you will either need to bond the back or use the Medium Fabric setting and rotary blade.
I will give instructions for the phone app and use the word “tap”. You would “click” on the computer.
Felt Gift Card Holder Instructions:

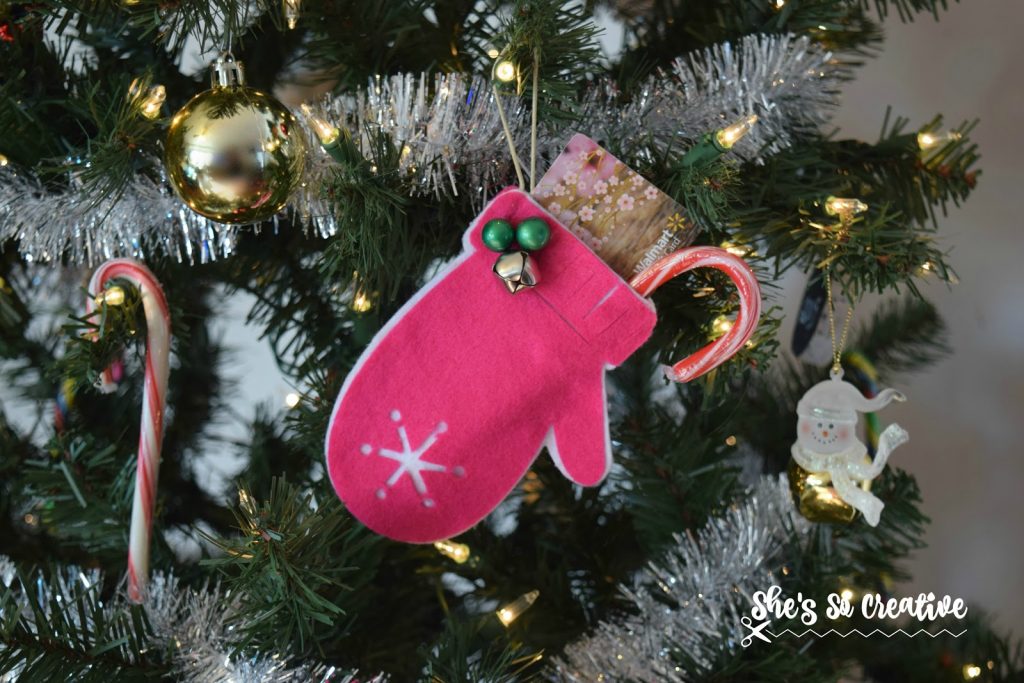
Mitten Gift Card Holder
Search images for “Mitten” (I used #M41EB5 – Designer’s Calendar)
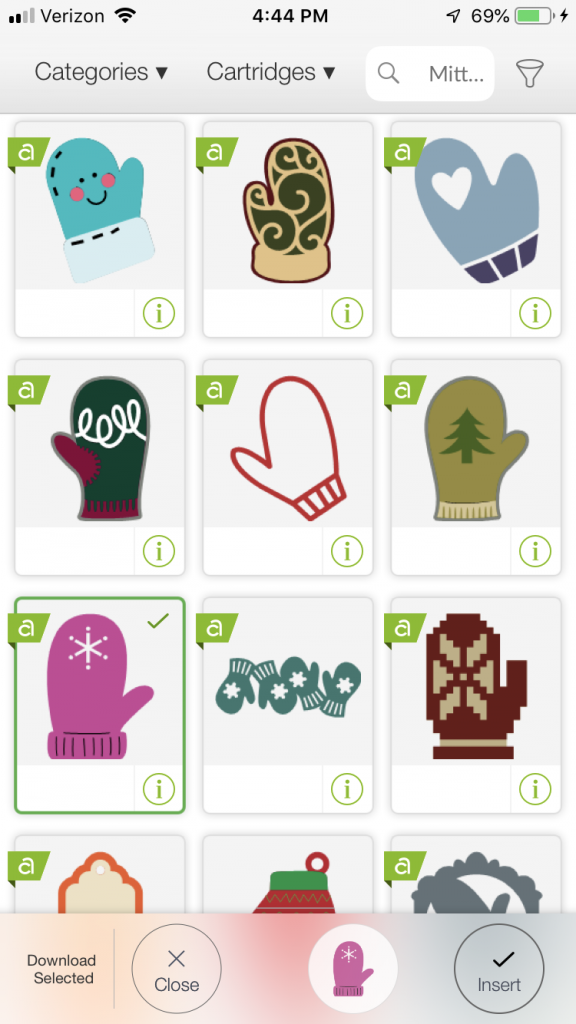
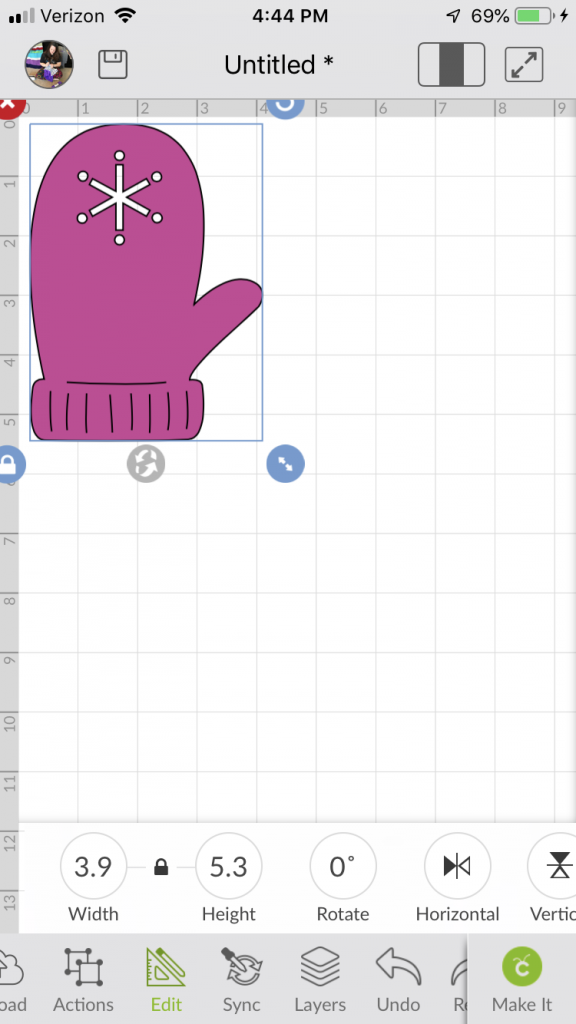
Edit to 3.9W x 5.3H
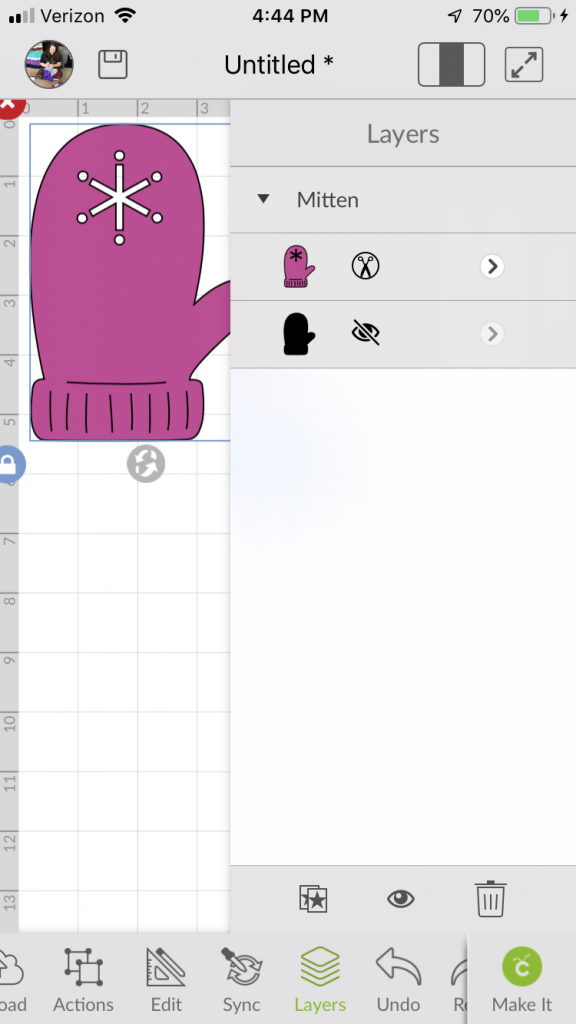
Go into Layers – Duplicate 2X
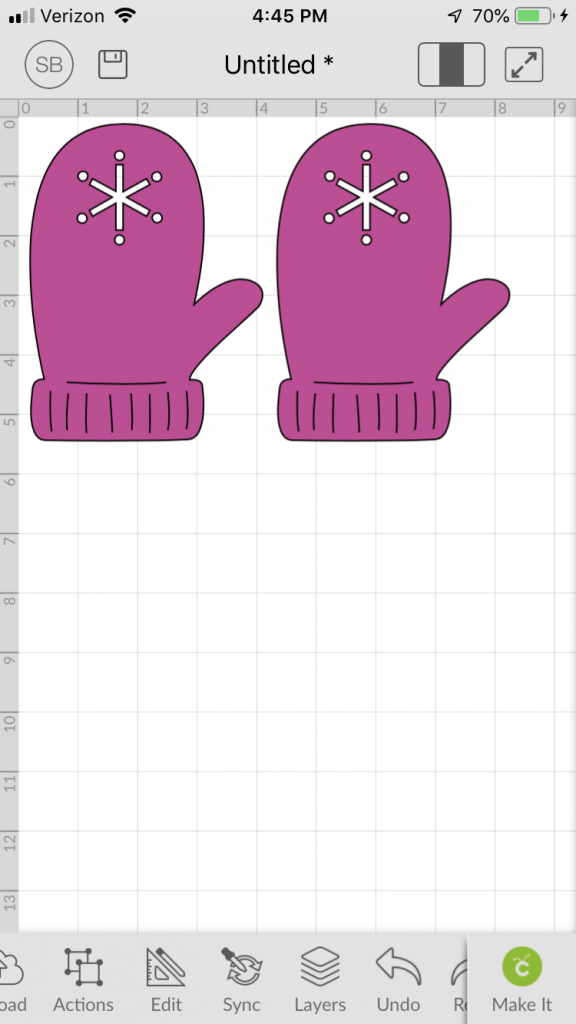
Move duplicates over, so one is beside to the first mitten and the other is lined up underneath.
Tap the bottom mitten, go into layers (this mitten will be highlighted in gray).
In layers, tap the eye next to the pink mitten layer to hide it, then tap the eye next to the black layer to unhide it.
Resize bottom (black) mitten to 4.2W x 5.6H.
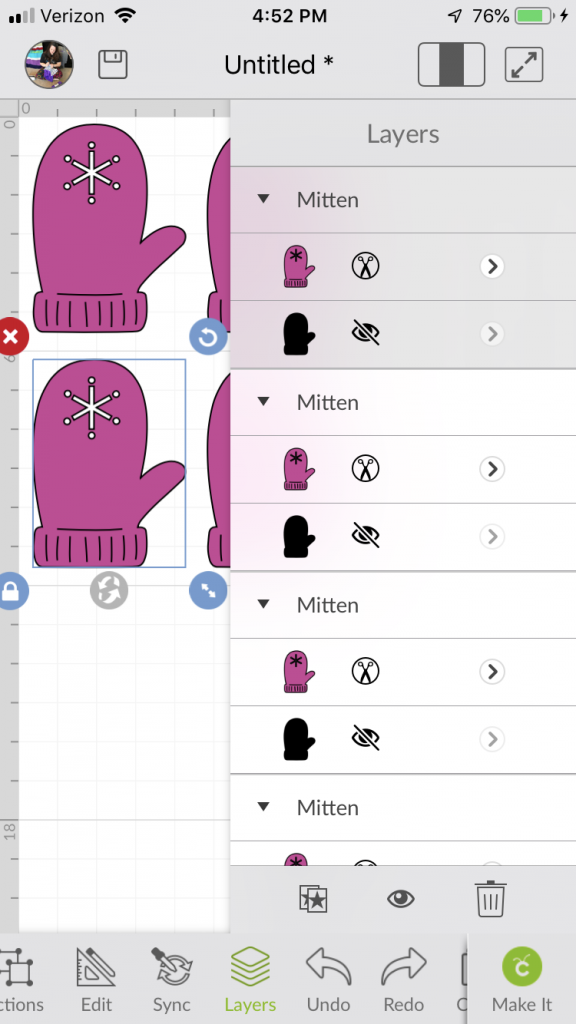
Tap layers and duplicate this mitten and line it up to the side (so it is the bottom right mitten).
Tap “Make it” (this shows mat 1 of 2; swipe to see mat 2)
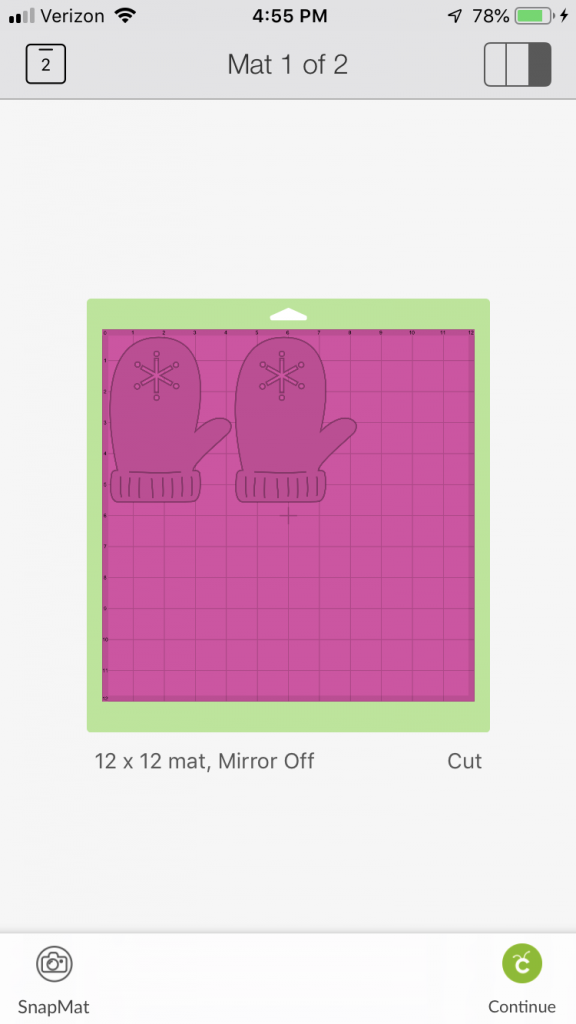
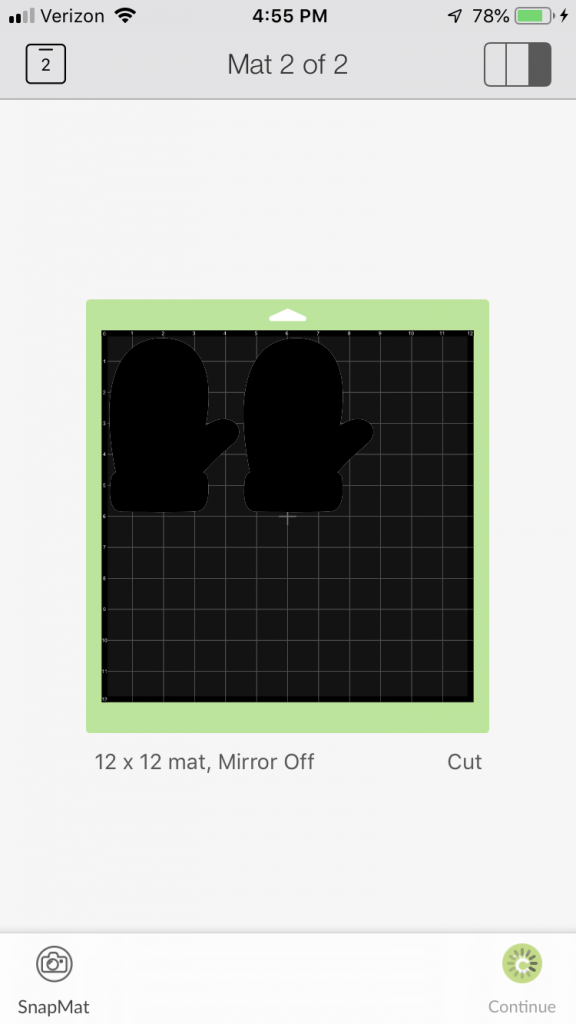
Continue to follow screen instructions (remember my notes about which material setting to choose).
Glue pink mittens over the top of white mittens.
Cut 7″ piece of twine and tie a knot in the end (hanger created).
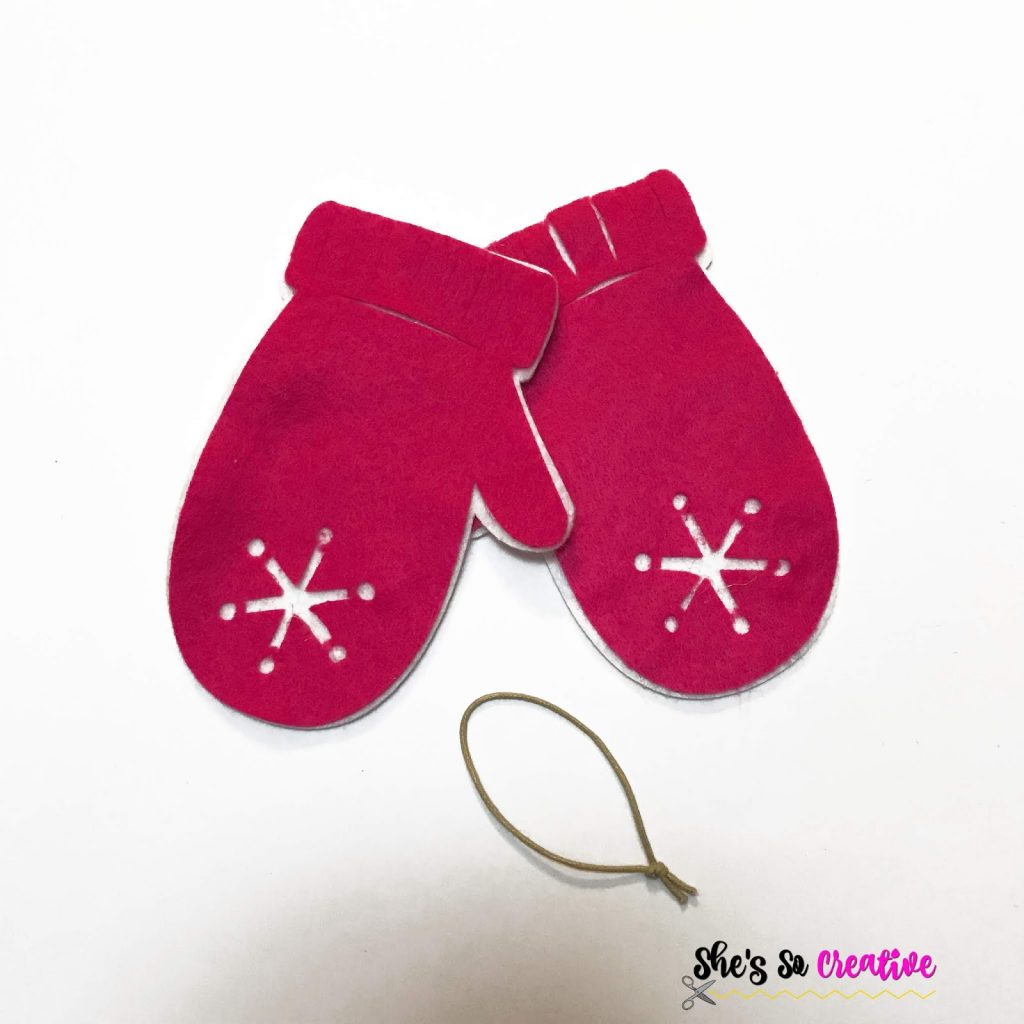
Hold white mittens together; Glue hanger in one corner, then glue around the edge from cuff, down around the hand, and up to the opposite side of cuff, leaving the top open.
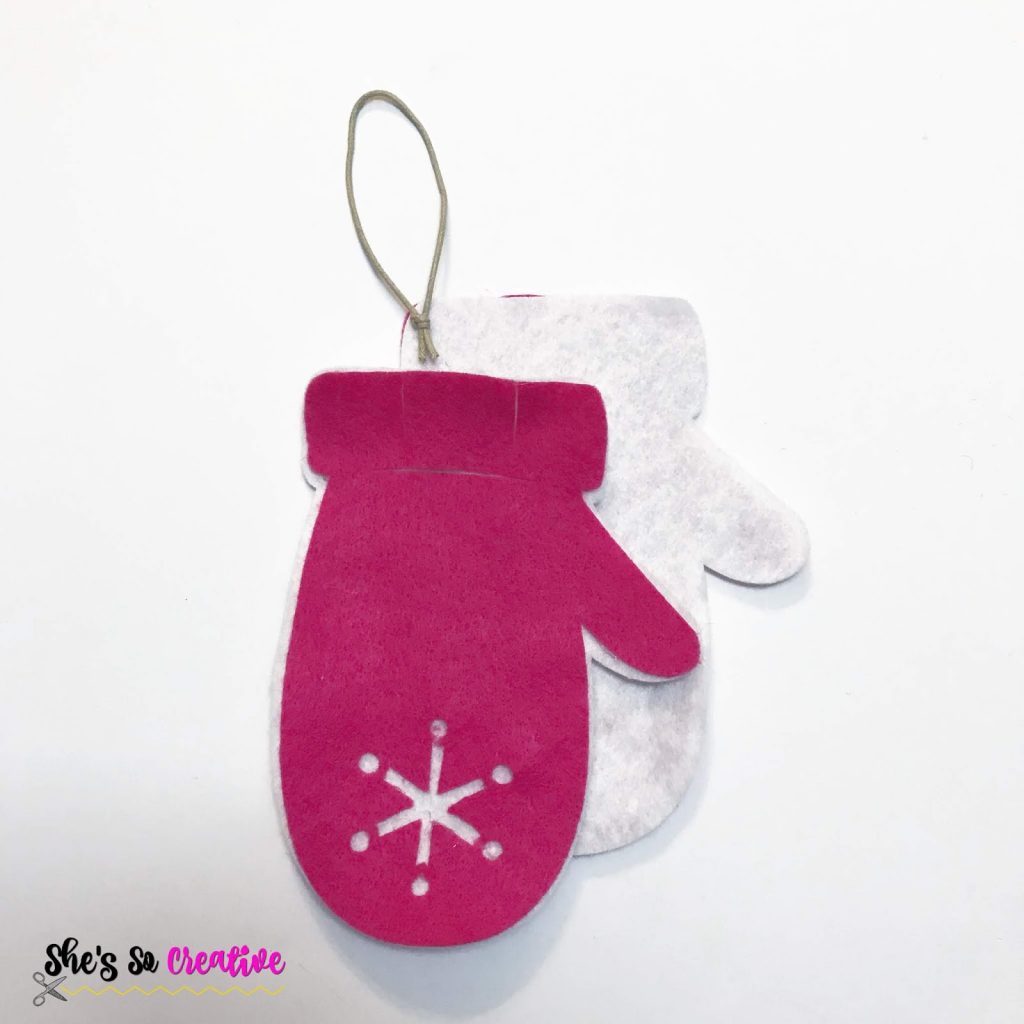
If using craft glue, you can use sewing clips to hold all of the layers together until they dry.
Thread floral pick through the loop on the jingle bell, twist to fasten in place, then clip off pick ends.
Attach floral and bell to the front side of the cuff on the same side as the hanger.

School Bus Gift Card Holder
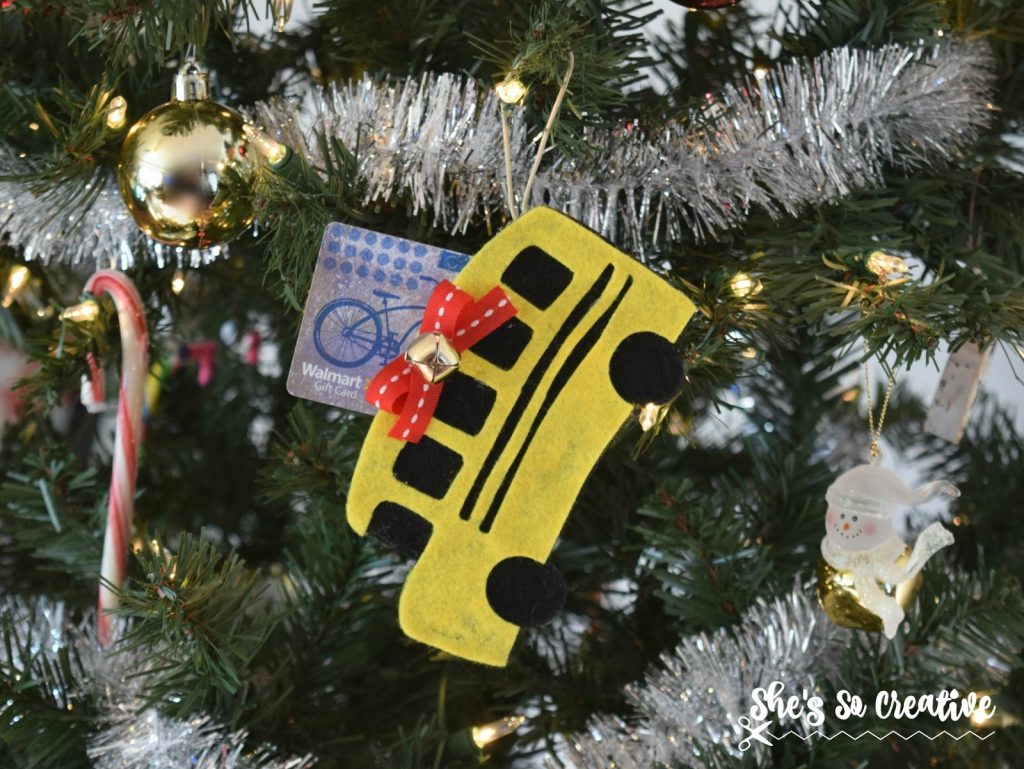
BUS INSTRUCTIONS
Search images for “Bus” (I used #M4542A – School Bus)
Edit to 5.3W x 3H
Go into Layers – click the eye next to the windows layer and the blue layer to hide them.
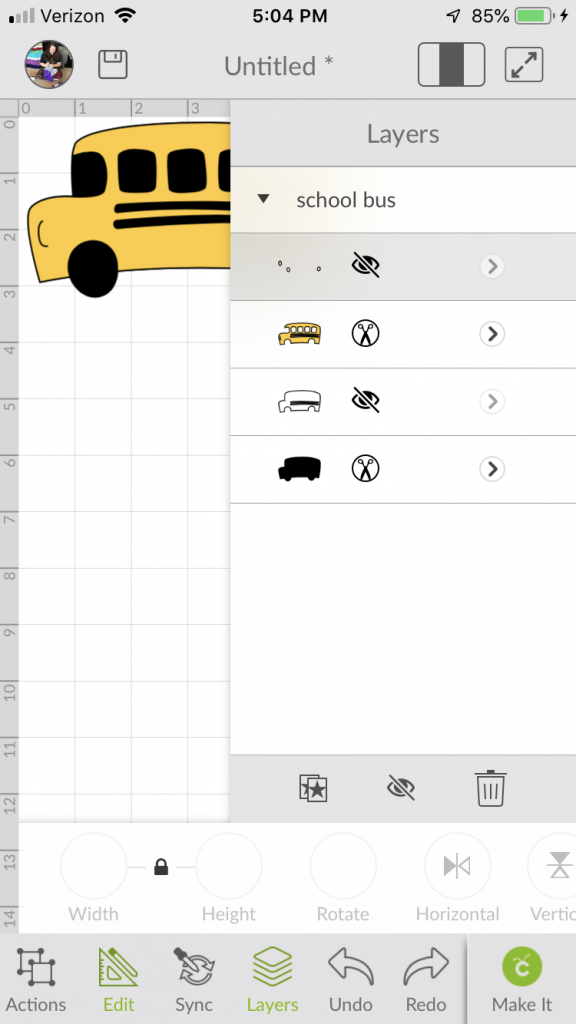
Now Duplicate the bus one time.
Move duplicate over, so one is beside to the first bus.
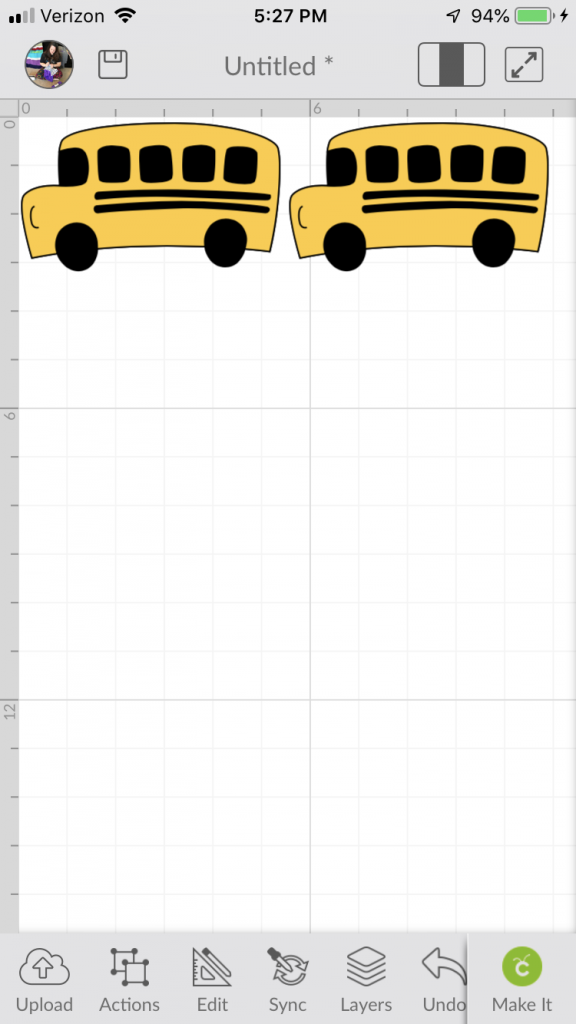
Tap first bus, tap edit, tap horizontal flip; this makes the buses mirror image, so they are facing the right direction when we attach the pieces.
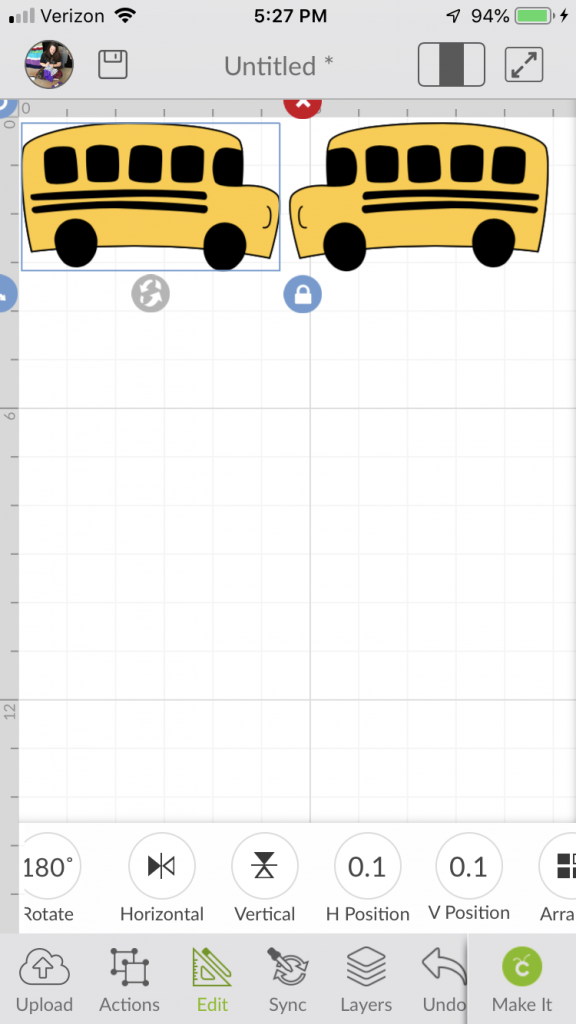
Tap “Make it” (this shows mat 1 of 2; swipe to see mat 2)
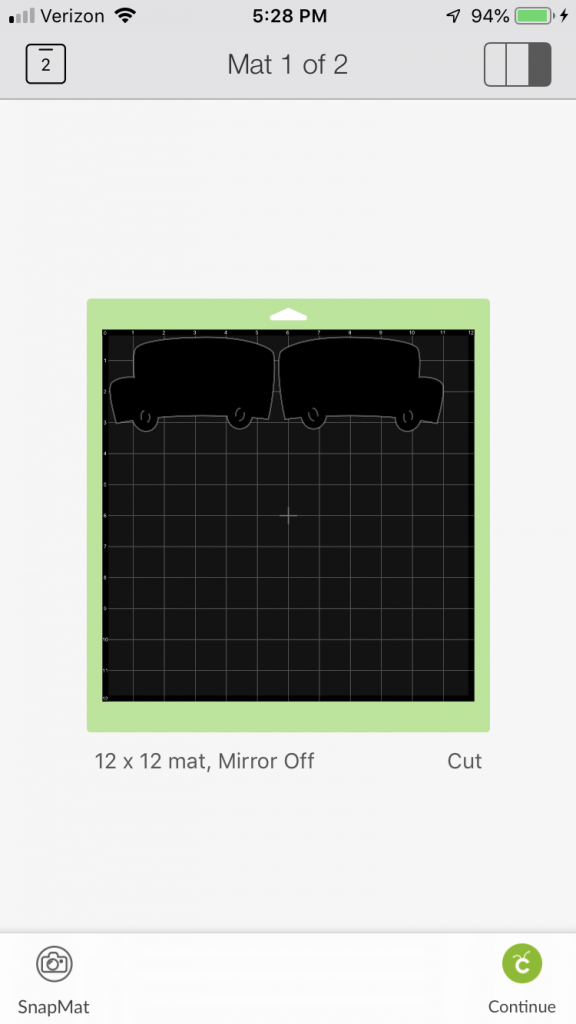
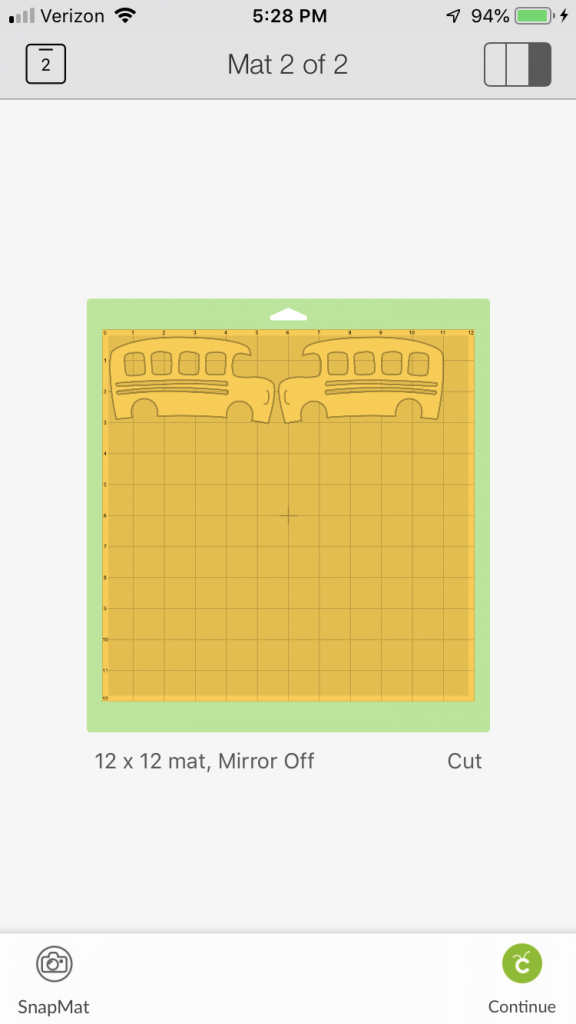
Continue to follow screen instructions (remember my notes about which material setting to choose).
Glue yellow layer over the top of the black layer.
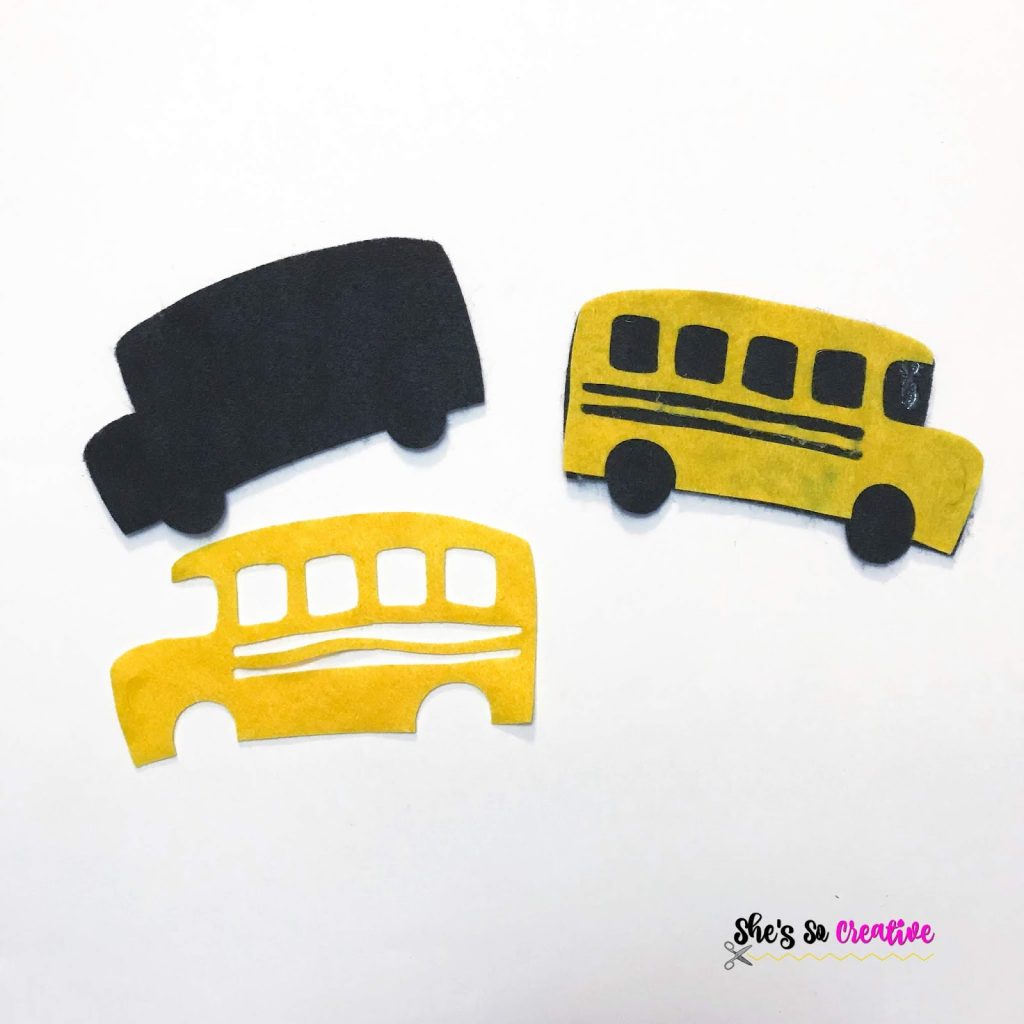
Cut 7″ piece of twine and tie a knot in the end (hanger created). Place hanger in one corner, then add glue.
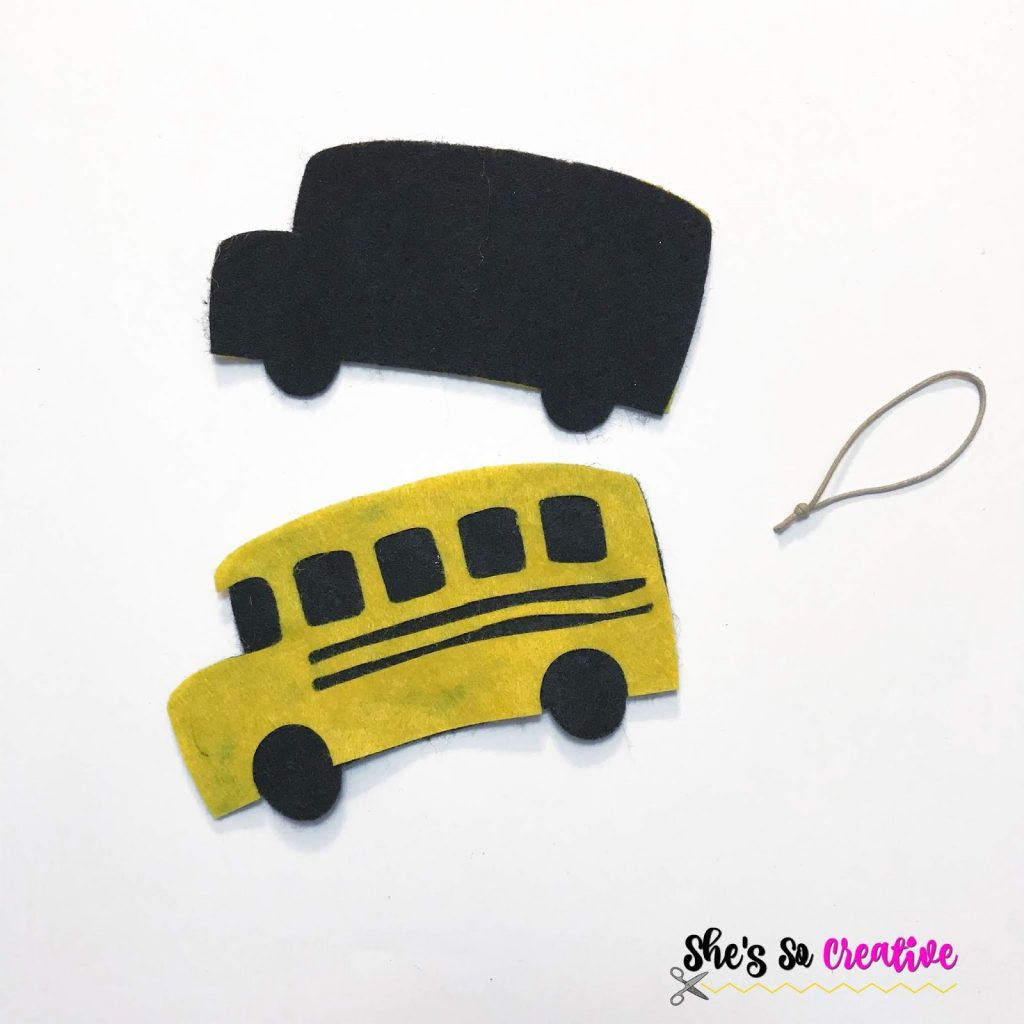
Hold black layers together, so the are facing the same direction; glue around the edge from top front corner of bus, down around the hood, across bottom and wheels, and up around the back; leave top unglued.
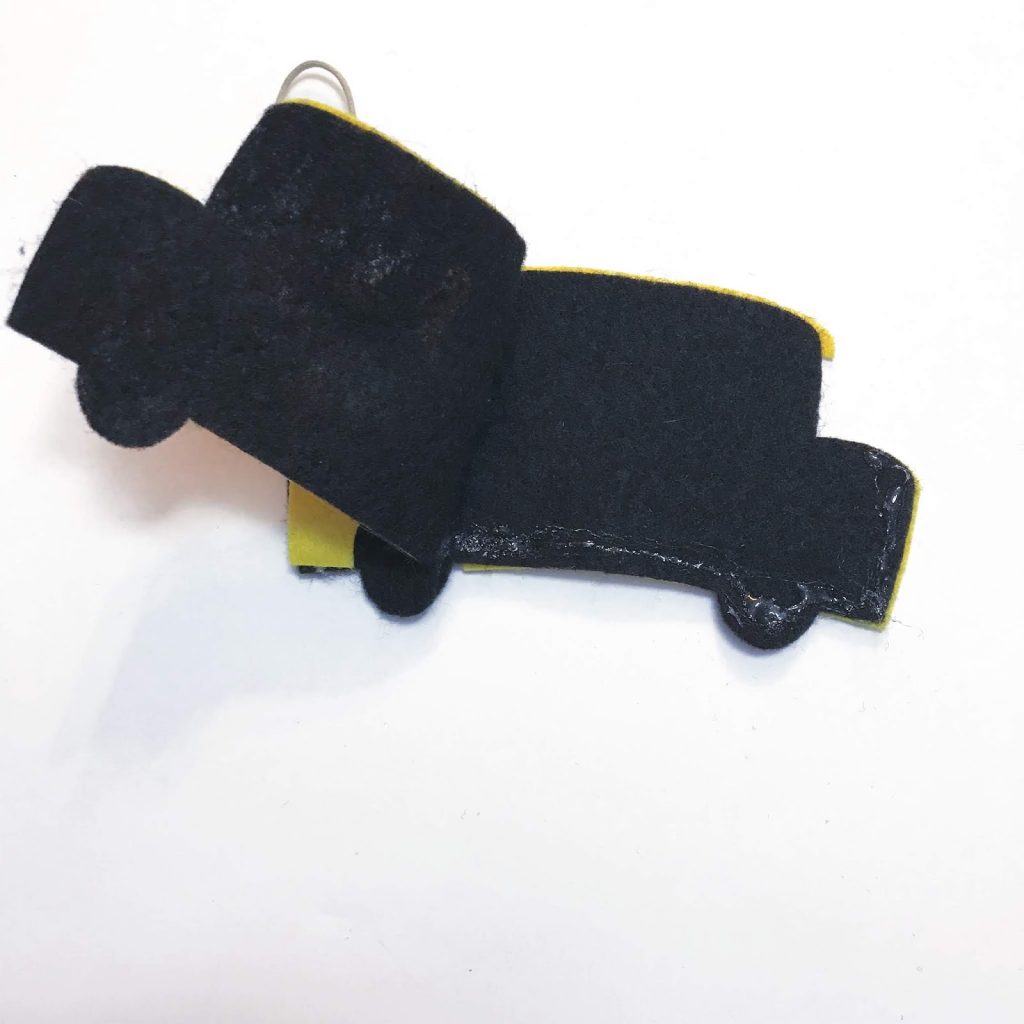
If using craft glue, you can use sewing clips to hold all of the layers together until they dry.
Cut 6″ piece of ribbon, fold as shown in photo.
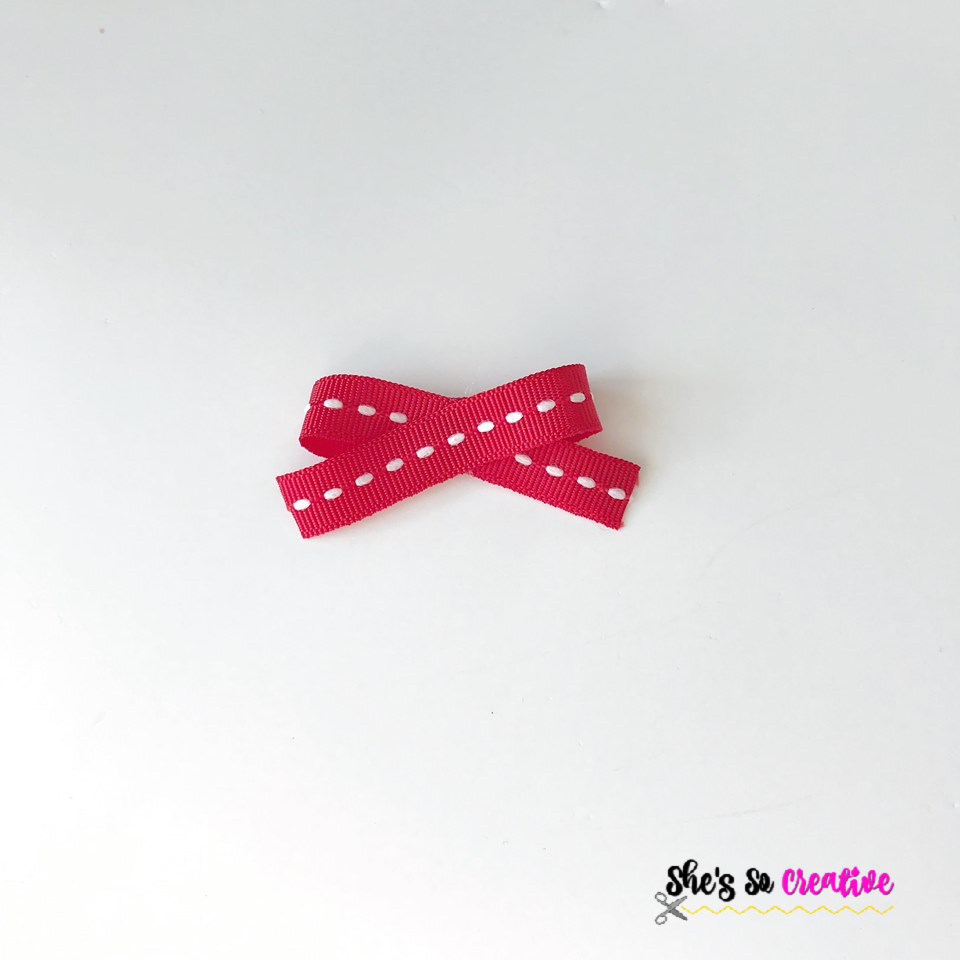
Attach jingle bell to center of ribbon.
Attach ribbon and bell to top center of bus.
Crayon Gift Card Holder
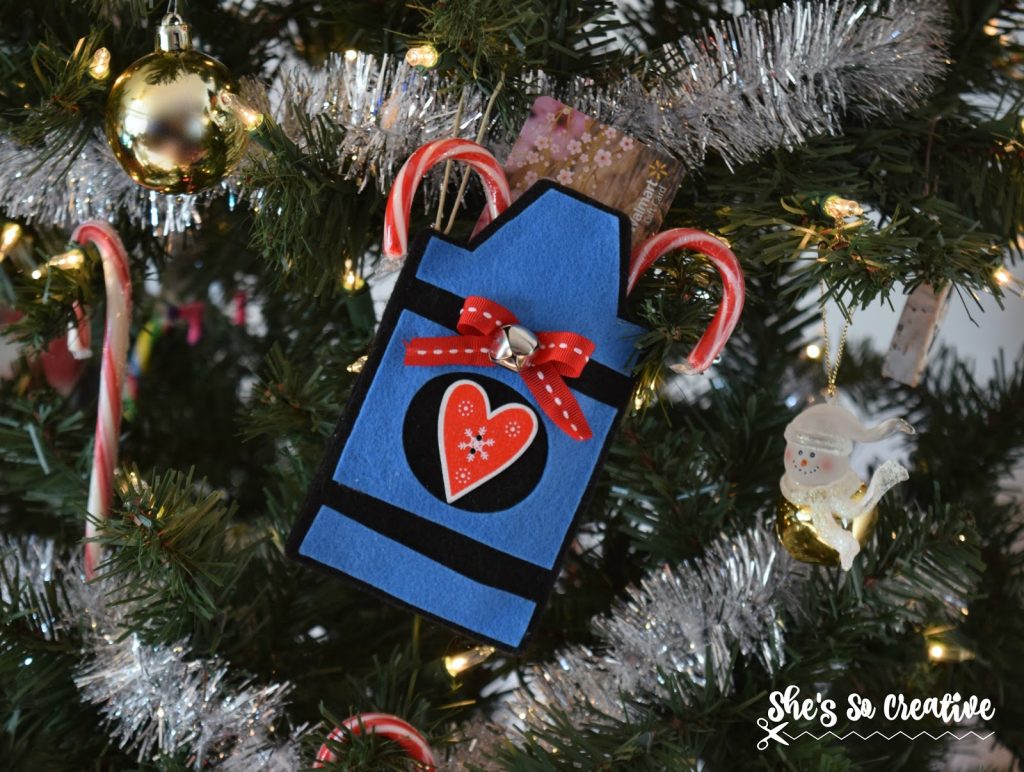
CRAYON INSTRUCTIONS
Search images for “Mitten” (I used #M41EB5 – Designer’s Calendar)
Edit to 3.9W x 5.3H
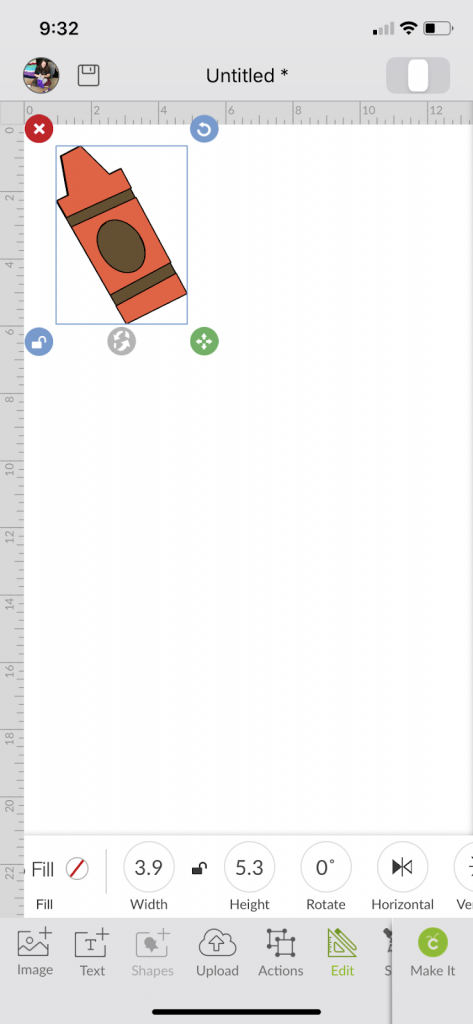
Also in edit, select new crayon color as desired. I changed to light blue (do not worry if it changes all to the same color, we will fix that shortly).
Go into Layers – Duplicate 2X
Move duplicates over, so one is beside to the first crayon and the other one is lined up underneath.
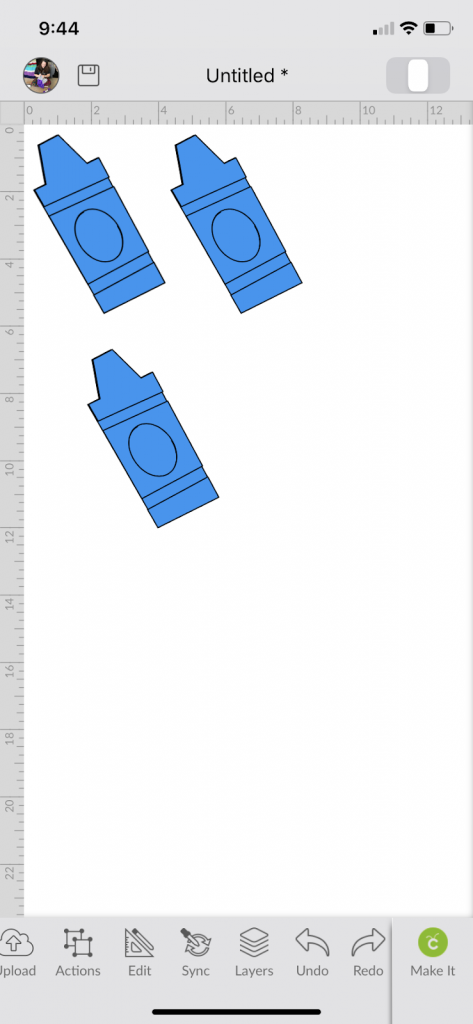
Tap top crayon, go into layers (this crayon will be highlighted in gray).
In layers, tap the eye next to the middle (all blue) layer to hide it. Repeat with other top crayon.
Tap the bottom left crayon, go into layers (this crayon will be highlighted in gray).
In layers, tap the eye next to the blue layers (top & middle) to hide them, then tap the eye next to the bottom black layer to unhide it. Repeat with bottom right crayon.
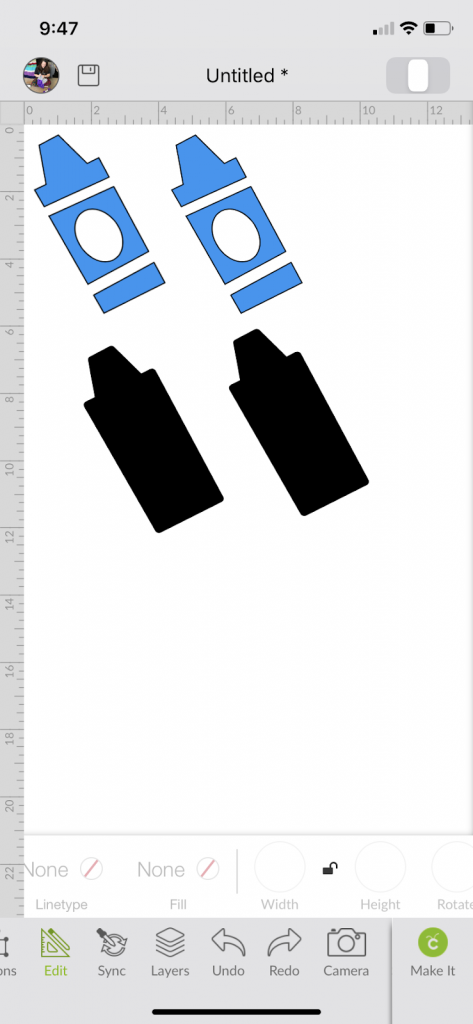
Resize bottom mitten to 4.2W x 5.6H (in edit tab).
Tap layers and duplicate this mitten and line it up to the side (so it is the bottom right mitten).
Tap “Make it” (this shows mat 1 of 2; swipe to see mat 2)
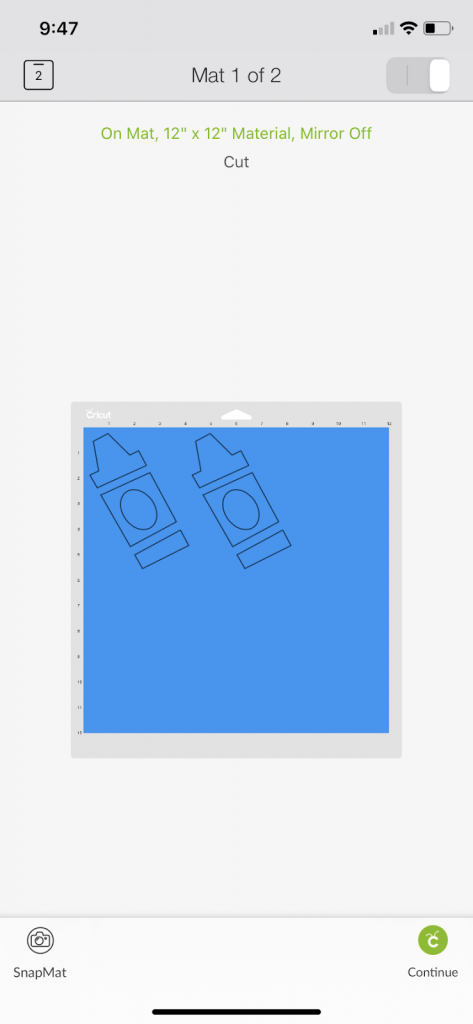
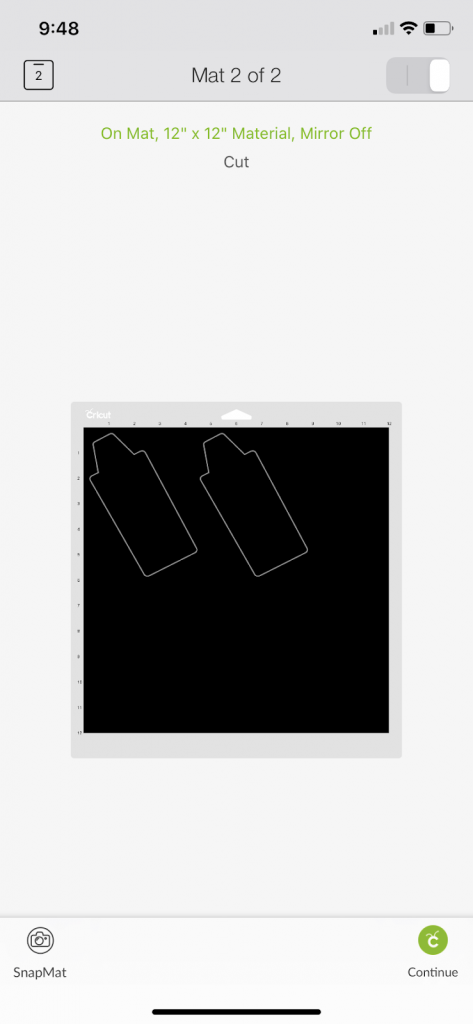
Continue to follow screen instructions (remember my notes about which material setting to choose).
Glue blue crayon pieces over the top of the black crayon. OPTIONAL: Leave circle center open and insert a photo!
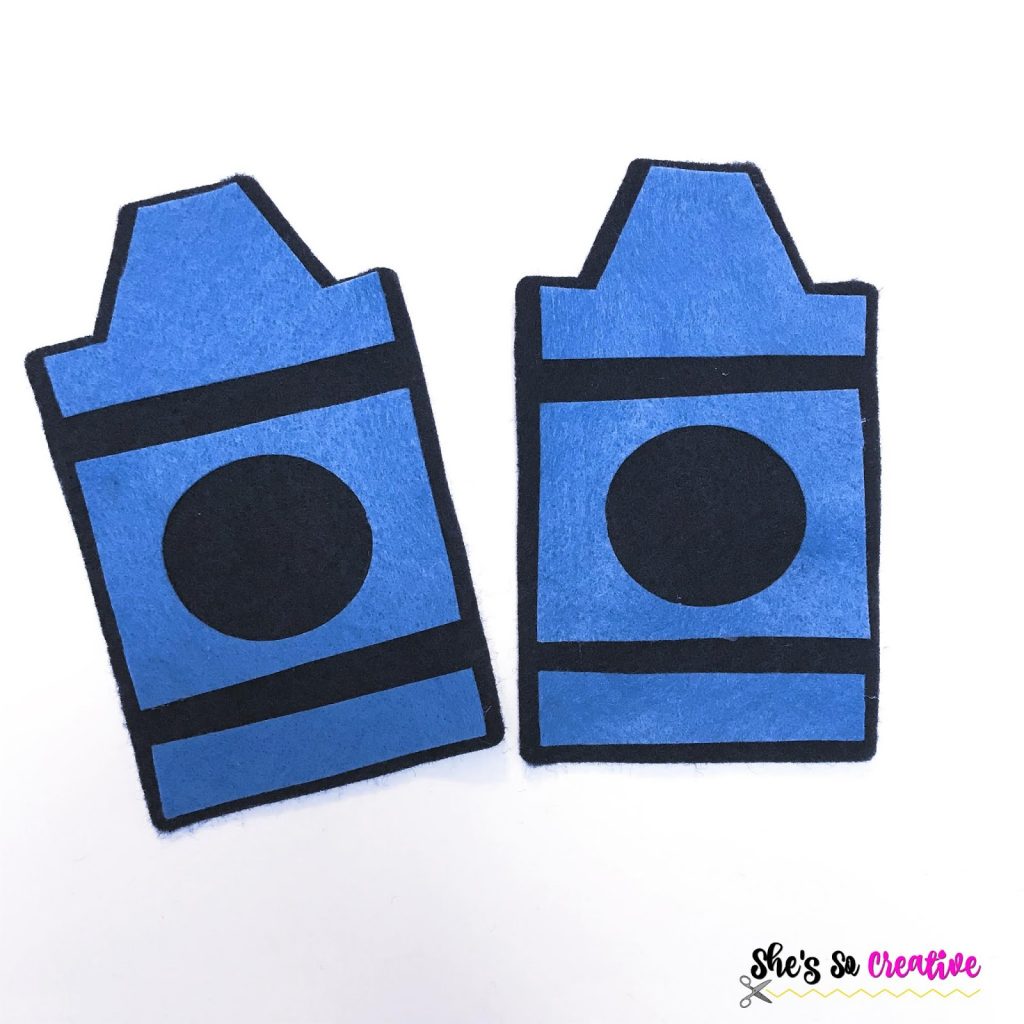
Cut 7″ piece of twine and tie a knot in the end (hanger created). Place hanger in one corner then add glue.
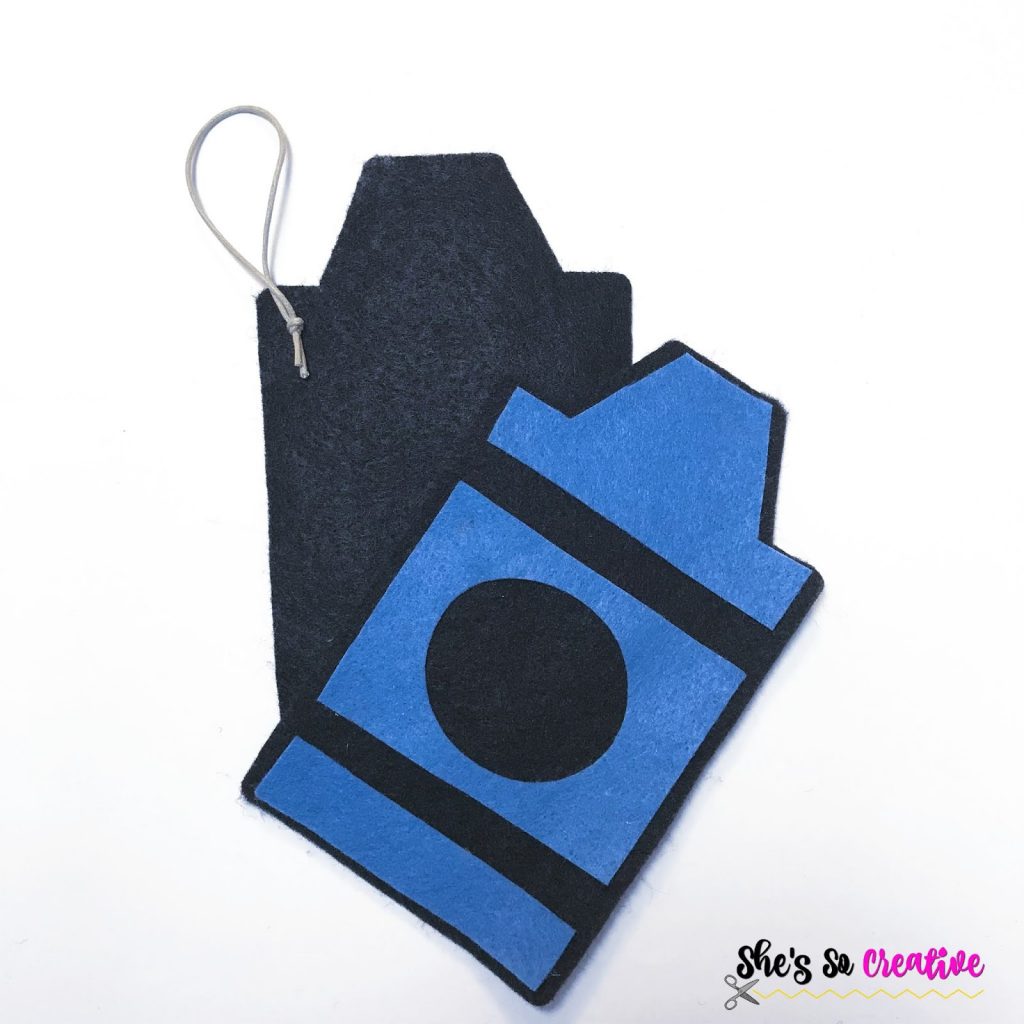
Hold black crayon pieces together; glue around the edge from the top corner, down the side, across the bottom, and up the opposite side.
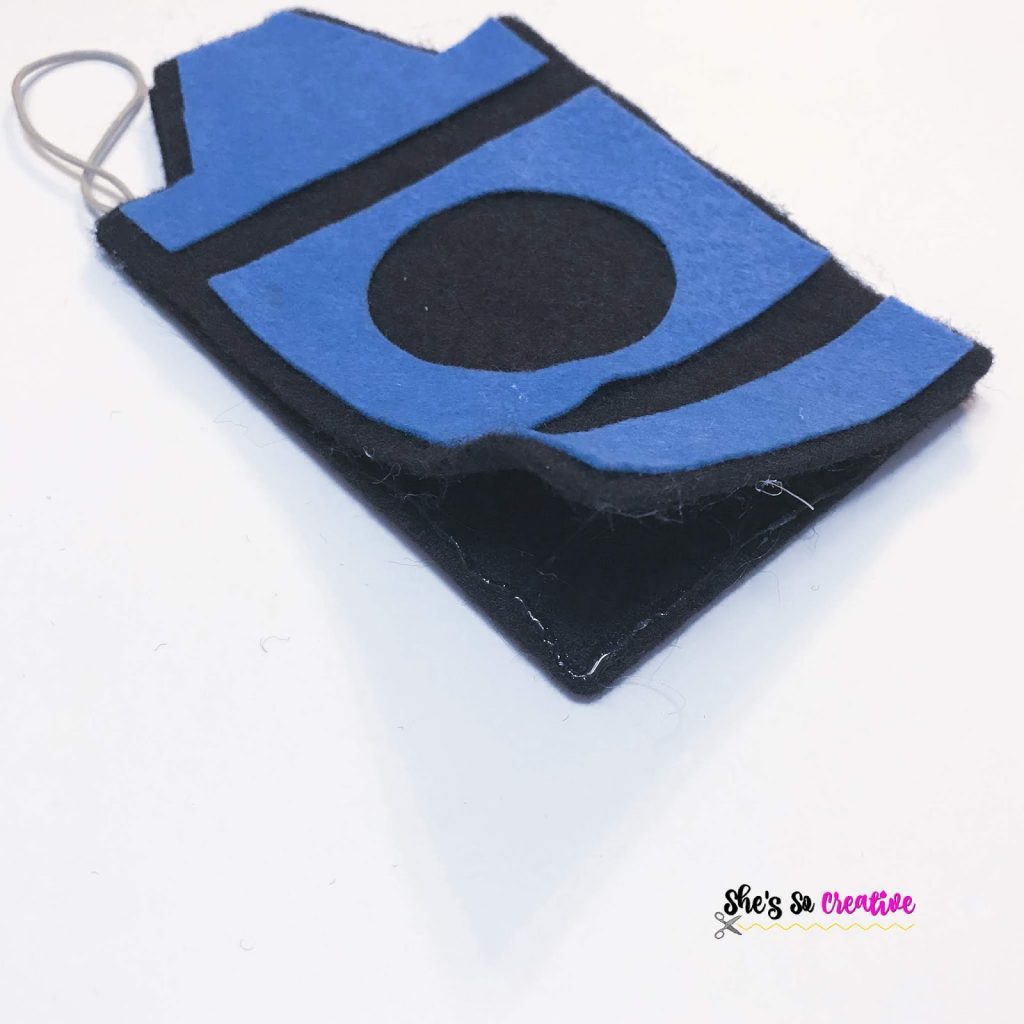
If using craft glue, you can use sewing clips to hold all of the layers together until they dry.
Cut 6″ piece of ribbon, fold as shown in photo.
Attach jingle bell to center of ribbon.
Attach ribbon and bell to desired location.
If foregoing a photo, you can add a button or other decoration to the center circle!
And there you have easy felt gift card holders made with a cricut!
Thank you for crafting with me today!
Come on over and join the She’s So Creative Crafter Community! And don’t forget to like me on Facebook and Instagram!

Written pattern and photographs © 2018 Sonya Blackstone of She’s So Creative. Please do not sell, share, or modify this pattern, but instead share the link to where the pattern can be found. Do not use these photos for advertising without written permission. Do not post this tutorial on your own website without written permission. You may sell any finished items you create using She’s So Creative tutorials.
Sonya Blackstone is a participant in the Amazon Services LLC Associates Program, an affiliate advertising program designed to provide a means for us to earn fees by linking to Amazon.com and affiliated sites.